User Interface Designer
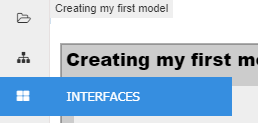
Pyplan has a specific layer for app creation .
This layer can be accessed by clicking on the icon Interfaces located on the left side of the screen.
Layout
Interfaces manager shows those I/O Interfaces created by the user and those that were shared by someone else. Shared interfaces can be used but not modified unless they are copied to user own workspace.
For doing this Right click on the interface and select the option Copy to My Interfaces.
Once it has been copied user has total control over that interface.
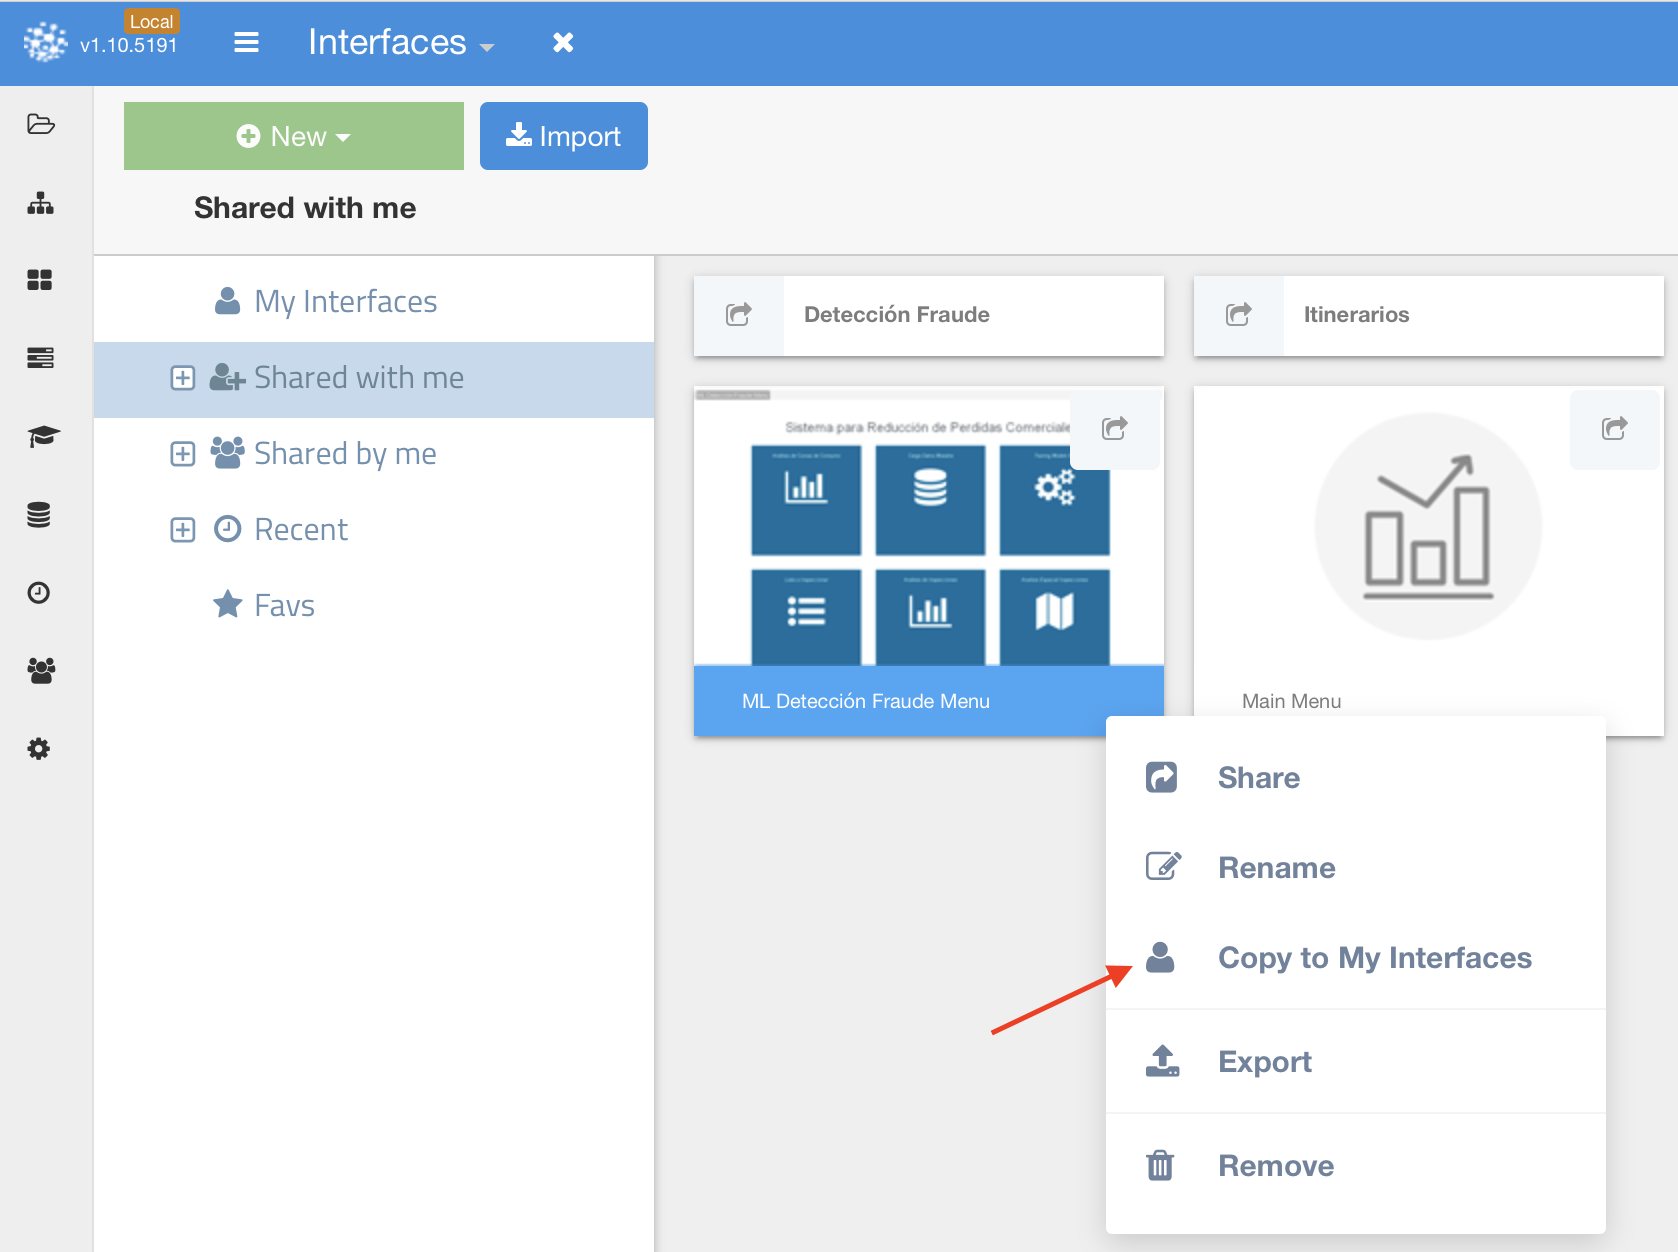
Favs app for quick access can also be set once the user owns the interface.
Creating an Interface
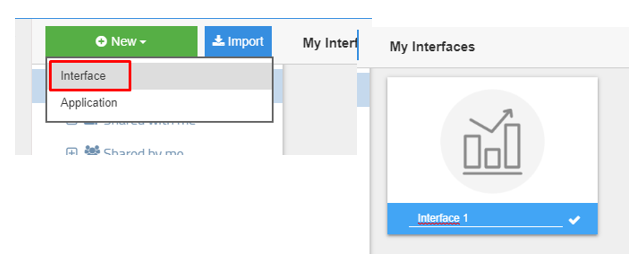
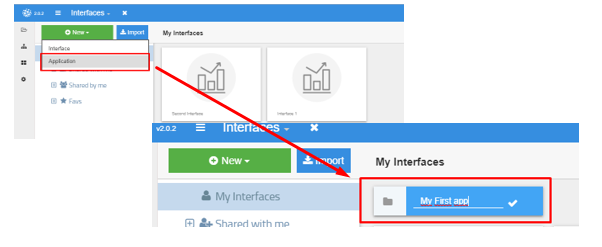
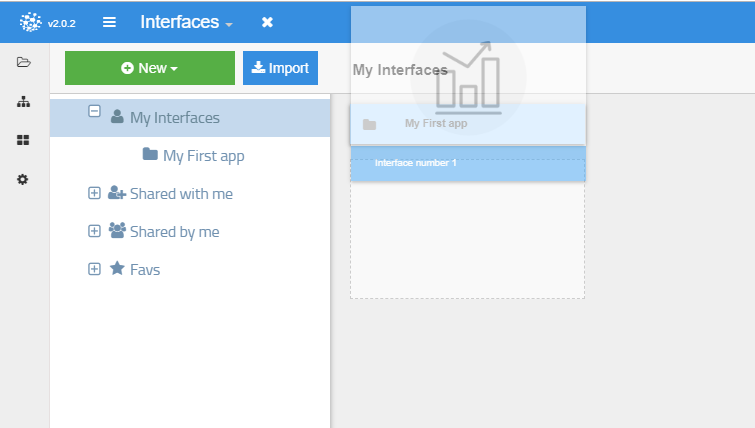
If you want to create an interface from scratch click on New and select interface.
Define a name for it and double click on your new interface
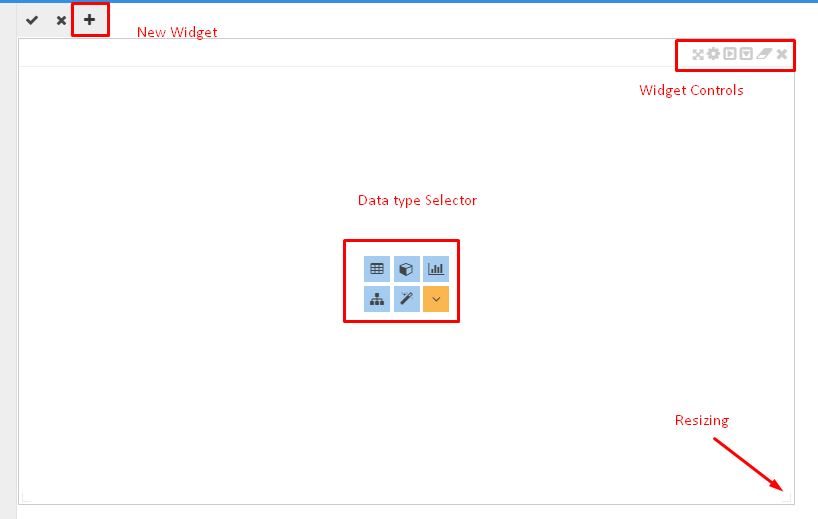
A white interface will open with a widget selector inside.
The interface layout is created by adding and resizing new widgets.
Widgets can be added by pressing + or by dividing existing widgets block space clicking on the arrows (Right or Down) found at the top left corner of every widget block.
Each widget can be used for displaying information from the influence diagram choosing among the different visualization alternatives described on section Node Visualization.
There are two ways of selecting objects from diagram to represent them in an interface.
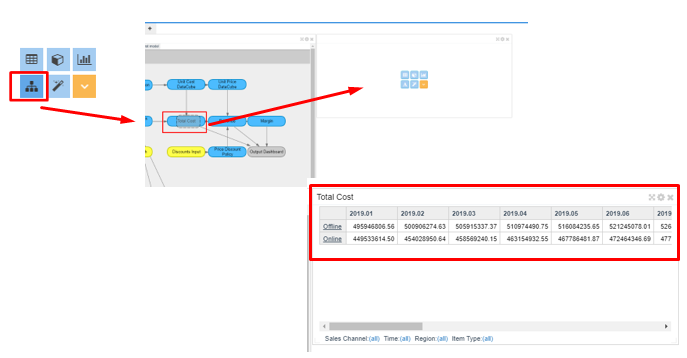
1- Click on the visualization icon you want to include and then search and select the node you want (searching by node Title or ID).
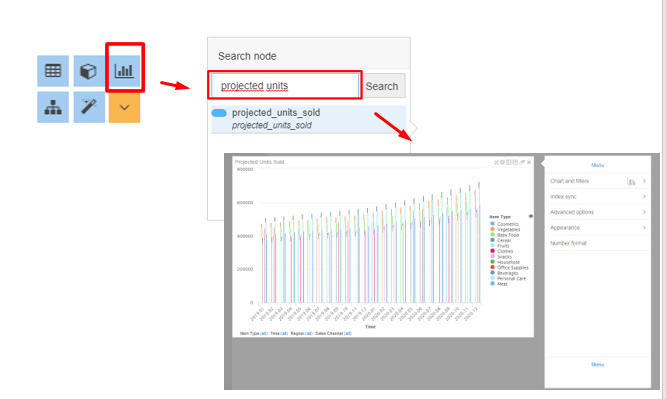
2- Or use one widget to show the influence diagram, then by pressing Shift + click on a node in the diagram, drag and drop it into the widget block you want to include it.
Inputs on interfaces
Interfaces can have inputs as well as outputs widgets.
In case of inputs widgets, depending on the type of input you need to make you can chosse among using Pivot grids, indexes or selectors
Pivot grids
This object can be used when you need to modify information of an array directly on your model.
For instance, in this example market growth information can be modified to simulate different scenarios, you may want to do this on your interface that is why it is presented as a pivot grid:
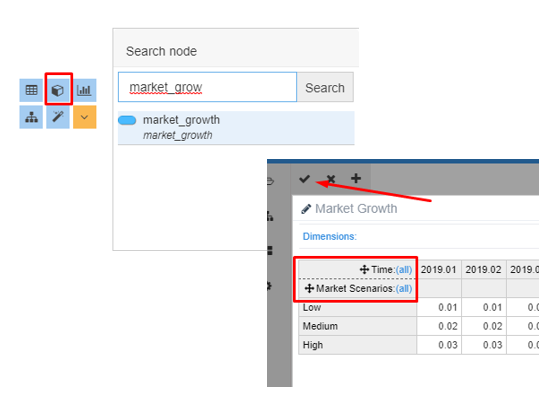
By dragging dimension in the correct order and pressing ok you build your input interface.
Indexes as inputs
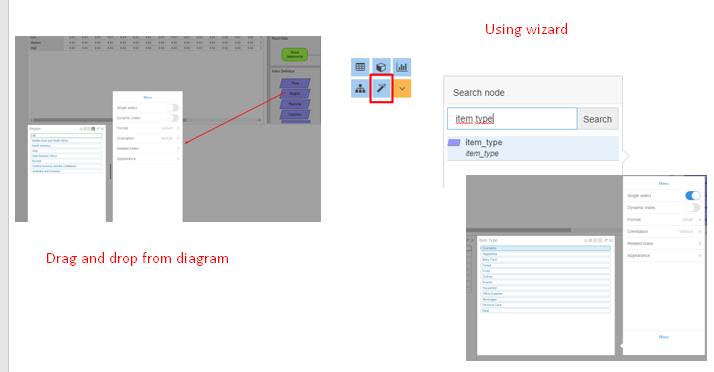
There are other interesting input objects:indexes (dimensions) and selector.
Indexes can be explicitly exposed on interfaces so that filtering along dimensions is easier.
If you need to set an index widget just drag it from de diagram or search for it using wizard object.
Indexes widget has their specific options menu.
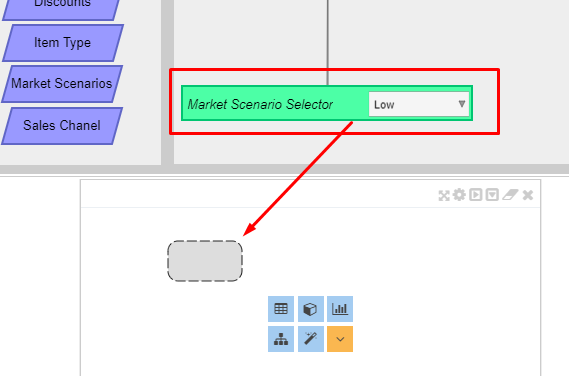
Selector input
Selector object can also being dragged and dropped from diagram to create an input widget.
Synchronization
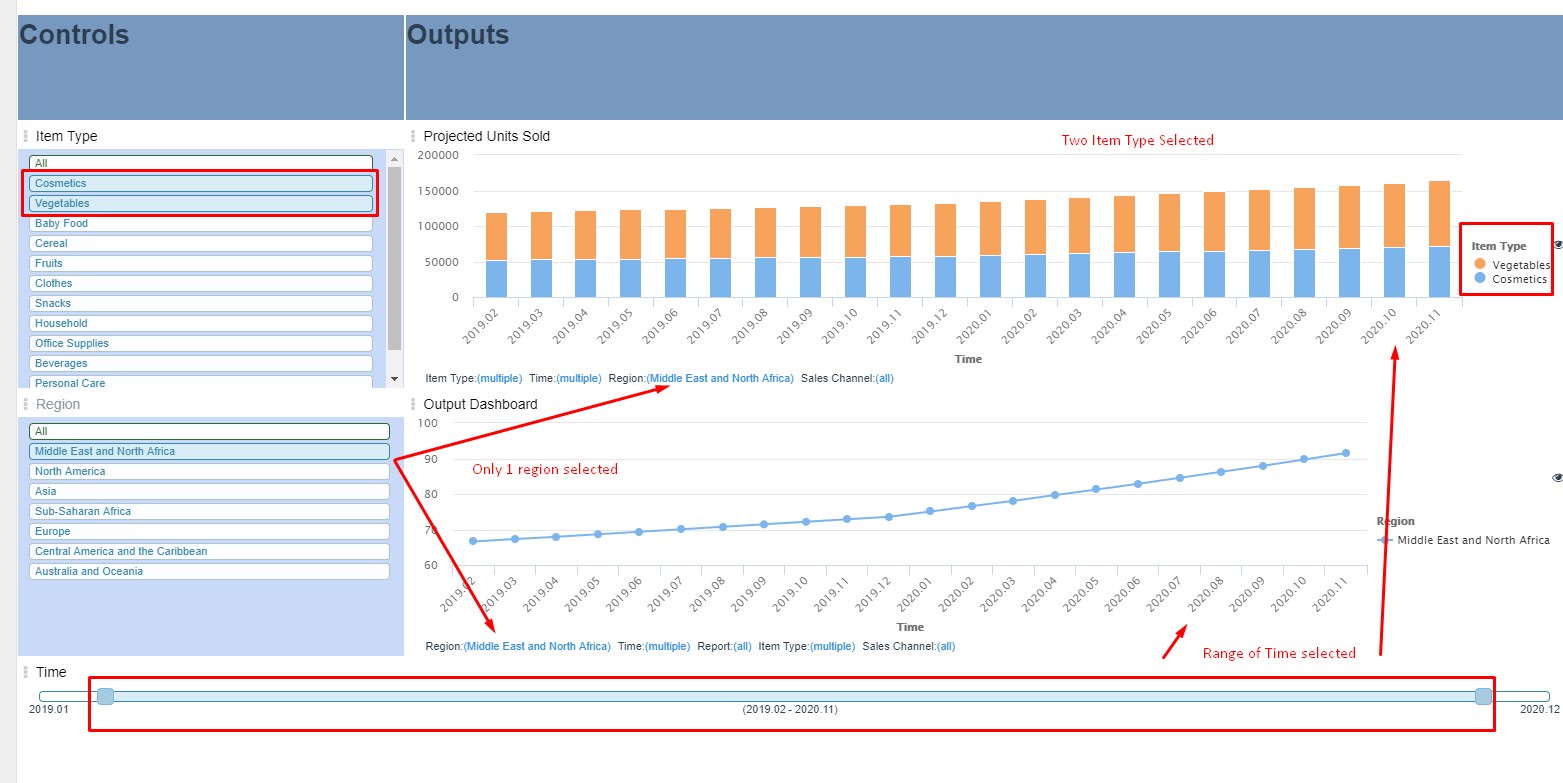
Once an interface has been created dimensions shared by objects in that interface are automatically synchronized.
That means that any selection in any part of the interface will apply to every presented object unless explicitly defined the opposite.
Let’s suppose you have created an interface like the following where region, item type and timeare explicitly exposed.
If you select a single region, a couple of items and a range of time these selections will apply to all interface.
 **Remember you can always choose to des-synchronized indexes as explained in
 Node visualization section.
App Sharing
Once you have created various interfaces you may need to generate an application for sharing it with other users.
Creating an application
Creating an application is as simple as selecting Application from menu and defining a name for it.
By dragging and dropping previously created interfaces in the application deployment is done.
Sharing an application
Select the application and press right bottom to access the following menu:


Share the application externally and make it accessible for every person with the link.
Congratulations your python coded application has been deployed.